Pg Sharrow One of the things I learned during years of plastic welding is that every formulation of plastic and COLOR behaves differently. White is different from Black. Blue or Red. Every time you change supplier or color you must change your technique.
pgtruspace's blog
about things that interest me.
My adventure in 3D printing
Posted by on February 6, 2019
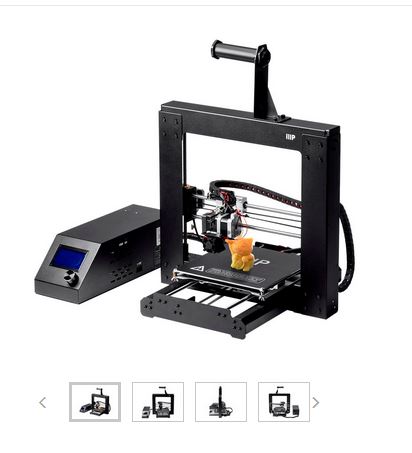
Monoprice 3D Printer IIIPv2
This Little 3D printer is about the minimum usable, as well as inexpensive, machine available. Amazon.com/monoprice $250 at this date.
2 years ago I purchased this little machine, with it’s 200mm x 200mm ( 7.8″ x 7.8″) build plate, so my grandson could get acquainted with this new technology along with his computer abilities. Last fall with the nearby Camp Fire and attendant bad air quality, I was reminded of the need for my water based air cleaners. I REALLY needed to get new ones built! even if just for me and other family members. So I set the printer up next to my computer and began the design. see: A new old project & The new old project continues. My sister prevailed on me to help launch this new business, it became important to share what I have learned, so she and her son could become familiar with the technology without starting from total ignorance..pg
The question of the cost to be a part of using 3D printing was posed and after some thought I replied; “ I am amazed at how little I have spent for the things that this little IIIPv2 printer, Optiplex780 computer and I have accomplished over the last 3 months. For less then a thousand dollars we have created things that would cost me tens of thousands and 2 years, 25 years ago. The 21st century is an Amazing place to this 20th century man…pg”
An excellent pdf on filament printing for a beginner starting out…pg
Back in 1986 I took a temporary job fabricating equipment for the Silicon Valley electronics industry. Equipment such as tanks, containment trays, fume duct work and fume scrubbers created from shaped plastic sheet stock parts Hot air welded together with a hot air welder and plastic rod. Plastic welding requires that the material be heated to the point that it will flow and stick, but not yet a fluid as one uses in metal welding. Plastic is made up of long chain hydrocarbons much like spaghetti that must be heated to the point that it is much like wet cooked pasta that will flow and stick but not break up or have it’s structure destroyed, a rather fine line of temperature that is particular to that type of plastic or alloy of plastics. 3D printing of plastic filaments is carried out under much the same conditions. In this case a miniature extruder under the control of a computer directed robot is laying down “welding rod” to create an object.
The job of the operator is to evaluate the conditions, manage the heat energy and material applied, to create the conditions for a good weld buildup of the part.
Due to the nature of the device being used the building part must remain solidly in place on the build bed during it’s creation. Much of the problems encountered in 3D printing center around keeping the building part in stuck in place. Then, at the end of the build the part should be easily removed so that the bed alignment is not disturbed, the bed surface is not damaged or warped, and the next part can be started.
Printer Notes:
New printer setup:
First thing, check all fasteners for tightness, Modestly tight, not finger tight, not OMG tight, but well fastened. All attachments must remain stable. The software assumes a stable machine and the printer does not self correct for any displacement during operation.
Set printer on a resilient bed such as ridged foam, hard rubber foam, etc. This will greatly reduce noise transfer and reduce resonant movements as the build bed and the mass of the printed object is rapidly moved under the Extruder head. Tie down the “Z” towers solid to frame, with angle braces or attachments to enclosure frame. The towers MUST be stable to the frame, there must be no chance of induced wobble during print bed movements. Any wobble can result in the nozzle encountering the solid work piece, causing a displacement that will ruin the work and may damage the printer.
We will be using ABS so heat management is critical for best results. The operating printer bed must be in a very warm, draft free environment, so an enclosure of some kind is important for consistent results. Being able to see the results of the printer’s operations as they happen is valuable, so the operator can observe, make any adjustments needed is very useful, so a “window” should be considered.
Periodic service before printing:
To insure that the part remains “stuck” to the print bed during it’s creation is critical to success. Be sure to clean bed covering of all dust and oils. Isopropal Alcohol works best, Acetone will work but will damage PEI coverings. Or add a glass covering, glass will require additional time to heat up ( 15-20min.), any glass will work and is less likely to be damaged by use, thicker glass will be less likely to warp, but glass will need additional fasteners to prevent movement on the bed table. Glass adds to the mass of the bed that will be in motion as well as it requires changes in the bottom limit switch position due to it’s additional thickness. We are using a Borosilicate glass covering as that has the best”stick” while hot and best release when cooled. Do not touch the bed covering after cleaning. To improve “stick” of the part to the build bed, various materials are often used to act as temporary “glue”. We are using ABS dissolved in Acetone as our sticking agent for most parts and sometimes Painters tape for really difficult to stick, critical large parts. The Painters Tape is the last resort as it is difficult to remove after the completion of the print. Also used by others are Hair Spray, paper glue stick, as well as salt and sugar. All water based that will stick hot and pop lose on cooling. many people print small and light pieces with no glue and others use special build plate coverings that seem to work with no additional adhesion. When printing with ABS it is critical that the piece remain warm and well adhered to the build bed during the build process. Any draft that might cool the bed, part or Extruder can ruin the work as well as the “stick”to the bed. Temperature MANAGEMENT is critical while working with ABS!
It is critical to adjust the machinery to be properly aligned, the Extruder must move parallel to the bed to lay even layers onto the surface of the build. In our type of printer the part creation bed moves back and forth in the “Y” plain under the Extruder. The Extruder moves in the side to side motion of the “X” plain and is supported by it’s carriage that is moved in the “Z” direction up to lay down the layers. In our case the Extruder carriage is controlled by two stepper motors that sometimes get out of synchronization, measure the distance of the carriage rods over the bed to be sure they are parallel to the bed. If not, they can easily be rotated into alignment while the printer is off. While energized they are electrically locked together.
To “level” or trammel the bed to printer nozzle there are adjusting thumb wheels or nuts in each corner of the bed. These are adjusted corner to corner, at least 3 times around. As you adjust one corner the diagonally opposite one will change as the bed teeters on the other two corners. Typewriter paper works well as a thickness gauge. Nozzle should just barely “grip” the paper to the bed. This must be completed on a “Hot” bed to be true for heated operation. It is very important that the first layer be properly stuck to the bed. We use “brim” as an attachment enhancement, as it adds no additional height to the parts, something that is critical to maintain measurements when several parts are assembled together. Once the printer begins the “Brim” the first deposition from the Extruder can be examined for good attachment to the build plate as well as the proper “squish”width and thickness.
It is at this time that I do final adjustment of the bed.
There are also now add-ons that will test the bed surface distances and read into the Gcode the needed nozzle position to properly stick that first layer.
After the print is completed and the print bed cools I slide a sharp thin blade under it to help release it from the bed. The more gently you can remove the part the better to prevent warpage or displacement of the bed adjustments.
Sharp thin blade tool:
I took a good quality, flexible putty knife and ground one side into a wood chisel like sharp edge. To assist lifting the part or for scraping the build plate I use it bevel side up to get under the brim and part to begin lifting them. Caution! Do not use this on a warm soft build plate cover material such as PEI, it will cut right through them, use only on glass or other hard materials.
Software We are using:
Acad 17 is being used to model the parts and export them as stl ‘s. There is also 360 Fusion available to private users as well as several free 3D modeling programs. These stl’s are actually cross-sections of the parts that are being exported into the Slicer that reads these files and then computes the needed instructions that the printer carries out. Printers are dumb, they are a very simple computer that only handle specific movements and temperature. Slicers convert the object into step-by-step directions for the printer to follow. Things like, maintain temperature, start extruding, move x-axis 10 mm and y-axis 2mm, and so on. Most of those commands start with a G, hence the name Gcode. A slicer translates the model slices into the needed movements, speeds and temperatures that are set in configuration instructions which the printer understands.
“Repetier-Host”, A freeware program, is being used to import the stl files and manage the “slicer” that creates the Gcode files and serves those instructions to the printer. Cura, A freeware program, is a slicer that is used to create the needed Gcode files that instruct the printer on how to execute the creation of the required piece. These Gcode files are the instructions that operate the “printer” to build the object one layer at a time by depositing material in amounts and position as dictated by the results of information developed by the “Slicer” program . The needed Gcode is specific to the printer being used and the slicer instructions are set in configuration before the slicer is engaged. The Gcode files are served to the printer through WiFi, or a USB connection or via. a SD card by Repetier-Host the server program that the “slicer” it is embedded in.
Problems,
Early problem was prints were so porous that water would readily go through the walls but the tops and bottoms were quite solid. Found that tops & bottoms set were default set at 3x and the walls at 1x. I reset the tops & bottoms to 2x as well as set the walls to 2x. This increased the time required and material used but resulted in a substantial improvement in part quality.
increased the extrusion rate 10% to get a stronger more solid part and the result was…
As I was attempting to print the third of 3 motor bases, again I hear this pop and the printer dislocates the “X” axis at about the 1.1 inch line, What the heck! This was 3 times in a row at about the same point, damaging the print. now I will have to section off the top quarter of an inch of the model and print 3 of those and repair all 3 motor bases. But why ? I sleep on this problem and… of course! the extrusion is too high. We have been making the layers just a bit too thick and after an inch of layers the build was too high and during a travel move from side to side the no longer high enough nozzle impacted the build so hard that the “X” belt jumped the sprocket and the machine lost it’s registry of position, always at about the same spot. Reduced the extrusion rate, end of that problem.
notes from 3D Printing:

Rob Smith I would print a temp tower… Believe it or not, every spool has its own ideal temperature, even if it’s the same material in the same color from the same manufacturer. Cura has a plugin called “ChangeAtZ” that makes it easy to change the temperature at specific layers, and there are dozens of models on Thingiverse to choose from. A good temp tower will have features that highlight bridging quality, overhangs, stringing control, and of course, surface finish. I like this one:
https://www.thingiverse.com/thing:2729076
https://www.thingiverse.com/thing:2729076

thingiverse.com
Rob Smith No problem! Protip: the temp tower is a great diagnostic tool, but it’s not the only one. There are a bunch of prints that are popular for “benchmarking” your printer’s performance… Lately Benchy has been the most popular (https://www.thingiverse.com/thing:763622) and before that it was Marvin (https://www.thingiverse.com/thing:215703)… but if you’re really looking to fine-tune your printer, there’s a collection of carefully-chosen calibration prints to challenge your sanity: https://www.thingiverse.com/thing:533472
If you have the chutzpah to try printing all of them a) remember each one is a unique purpose-built test, and it’s designed to be challenging, and b) post pictures!
If you have the chutzpah to try printing all of them a) remember each one is a unique purpose-built test, and it’s designed to be challenging, and b) post pictures!

#3DBenchy – The jolly 3D printing torture-test by CreativeTools.se by CreativeTools
thingiverse.com
for setup of the IIIPv2 in Curia
Trying this –
https://www.youtube.com/watch?v=DDXo2GBmbtU
https://www.youtube.com/watch?v=DDXo2GBmbtU

youtube.com
-
Keith Hilderbrand This is full of good info
https://www.youtube.com/watch?v=WogdQL-ZS2Q


youtube.com
Aaron Greengrass Printers are different enough from each other that there are no ‘standard’ settings. My hotend has had 4 different layer cooling fans. Each one requires a number of changes to print settings to get a good print. Of the 9 printers I’ve owned so far, only 2 have even been vaguely similar, and even they didn’t have identical settings. Test, adjust, and test again. Print slower. Watch a lot of youtube videos about dialing in printer settings. Look at the print troubleshooting pages (the one simplify3d has is pretty good). Expect this to require trial and error. Expect also that whatever settings you get working will require changes not only for different types of filament, but in many cases for different colors (ie translucent vs solid color print very differently)
Todd Saltzman The way you have to approach it is when your print comes out bad you need to identify what exactly is bad about it. Such as is it over extruding or being too stringy etc. then you need to look at the solutions to your problem and just adjust small things at a time.
The way you have to approach it is when your print comes out bad you need to identify what exactly is bad about it. Such as is it over extruding or being too stringy etc. then you need to look at the solutions to your problem and just adjust small things at a time.
advise and links I greatly appreciate…pg
link to hot end assembly and PID tuning :
9 responses to “My adventure in 3D printing”
please say something interesting
Recent Comments
| p.g.sharrow on Amond Cookies | |
| Simon Derricutt on EMF disk Propulsion propo… | |
| p.g.sharrow on EMF disk Propulsion propo… | |
| Simon Derricutt on EMF disk Propulsion propo… | |
| p.g.sharrow on EMF disk Propulsion propo… | |
| p.g.sharrow on EMF disk Propulsion propo… | |
| Simon Derricutt on EMF disk Propulsion propo… | |
| Simon Derricutt on EMF disk Propulsion propo… | |
| p.g.sharrow on EMF disk Propulsion propo… | |
| Simon Derricutt on EMF disk Propulsion propo… | |
| p.g.sharrow on EMF disk Propulsion propo… | |
| p.g.sharrow on EMF disk Propulsion propo… | |
| Simon Derricutt on EMF disk Propulsion propo… | |
| p.g.sharrow on EMF disk Propulsion propo… | |
| Simon Derricutt on EMF disk Propulsion propo… |

Hey, that is really interesting find, pg!
@Zeke;cost me a hundred more when I bought it for my grandson’s use nearly 3 years ago.
When we decided to really pursue this Airwasher business I elected to dive in myself and get knowledgeable in this new field. With a good Desk top computer and a working 3D printer, I now have a manufacturing empire at my desk!….pg
The first production Beta-Test unit is under construction! The little printer is singing it’s song of creation.
Welcome to the new age of manufacturing. 66 hours of printer time to convert 730 grams or about 1.5 pounds of ABS plastic into an Airwasher that looks like it is a heavy duty “factory” made industrial fume scrubber. I’ve dreamed of this for 25years. A manufacturing Empire on a desk top! Truly a new age, this 21st century. Next is to “hire” 10 more robots and real production can start ;-)…pg
Next create DYI instructions, materials list and .stl file set…pg
pg – may be worth pointing out that you can either extend the size of the printer you have by getting longer lead-screws (or ball-screws) and frame, or that you can build from scratch using sections of extrusion. Since the standard construction isn’t that rigid, you could also use a base of blockboard or heavy plywood (or welded steel) to build on and get better rigidity and accuracy than the standard solutions. You can if you want use V-rails rather than rods and linear bearings to get more precision. The boards are pretty cheap and the firmware is open-source, so if you’re intending to have a printer farm you could likely make your own somewhat cheaper and better than you can buy off-the-shelf. The main effort is in sorting out the software to use, and you’ve already invested that. Costs do go down when you buy in bulk rather than one-off.
@Simon, you are right, a point I have considered. My sister and her son have ordered up a next size larger generic printer for him to learn on before any decisions on expansion are really made. For now I am concentrating on creating a working model that can be duplicated and sent out for market development. Any real consumer product should be injection molded as that would reduce the manufacturing cost by near 90%. It’s just that that first one of those will cost $500,000 to build and these have a startup cost of less then $1,000 to build the first ones.
A printer built within a ridged steel frame would be the best along with a Raspberry Pi controller, now that would be an Ideal way to set up a printer farm, the printer frame could also serve as the containment frame for environmental temperature control, a critical variant in this field…pg
Pingback: The New Old Project – multiplication | pgtruspace's blog
Pingback: The Completed, Old New Project | pgtruspace's blog
The poor adhesion in a part is likely caused by temperature in the printer space, probable dropped 5 F and the part/print junction is a bit too cool for the weld
We roboticly weld miniature plastic rod into shapes. To do this we heat the rod to it’s “glass transition” temperature and press it into the print area according to a programmed path through the use of robotic devices.
The “Glass transition” is the point where the solid plastic begins to get sticky and flow like cooked spaghetti but before it turns liquid and it’s molecular structure is ruined. Once the “plastic” material is deposited it must immediately “freeze” back to a solid before the nozzle moves on or the junction and core of the rod tears. Once you grasp this you will know everything needed to trouble shoot the cause and effect of the operation and can pursue possible solutions
Steve Thomas
to
Monoprice Maker Select Plus Owners
2 hrs ·
You may have seen this before but if not it is worth a look it. Its basically all the board, pin out info for the Wanhao Duplicator i3 (or MMSP in our case 🙂 ). Good knowledge base though. http://sebastien.andrivet.com/en/posts/wanhao-duplicator-i3-plus-3d-printers/?fbclid=IwAR1fU2uuSurXEbFudtNRHO1KweeC34vmf2UmSsLM8O6goSS1QOd4aJfUxZc
sebastien.andrivet.com
Wanhao Duplicator i3 Plus 3D Printers (UPDATED)
I am not affiliated, associated, authorized, endorsed by, or in any way…
I am not affiliated, associated, authorized, endorsed by, or in any way officially connected with Wanhao, or any of its subsidiaries or its affiliates.